So last night I was clueless as to what to make for dinner. I really wanted to make a chowder of some sort, then decided against it at the last minute - mainly because I can never make it taste like my mom's. And since her's is delish and mine is less so, I don't bother. I should really ask her for her recipes sometime.
While wander around the grocery store I settled on fish. Haddock specifically. Then came the decision of what to do with it: batter it, bake it...oh the possibilities. Then an idea struck: I'd pan fry the fish and make a fruit salsa to go on top! Perfect!
And it really was close to perfect, if I do say so myself.
This is one of those less exact, make it how you wish recipes. Here is mine:
1 mango, diced
1 ring of pineapple, diced
1 plum, diced (if you're patient enough, peeled)
1 mini cuke, seeded and diced
1 ring slice of red onion, diced
1 side of an orange bell pepper, diced
1-2 cloves of garlic, diced finely
1/2 - 1 jalapeno pepper, finely diced
juice of one lime
healthy sprinkle of sugar
healthy sprinkle of salt
Throw everything into a bowl and let is sit a while; at least an hour. It will be come juicy and delicious. If you want it juicier add more salt and/or sugar.
The only thing I wished I had thought to add to it was strawberries. Peaches would be quite yummolicious in this as well. I only use a half a jalapeno and found it to be plenty spicy. If you like it spicier go for the whole shebang. Just remember the heat comes from the seeds and ribs, so be sure to remove those, unless you like it inferno spicy, then by all means give'er.
I recommend for this recipe you use a mild flavored white fish. As I mentioned I went with haddock.
Once your fish is cooked and you've decided and prepared what your side will be (I went with regular white rice) spoon this colorful delight on top.
It was flavorful and fresh and was a perfect complement to the fish. This is something I will definitely make again!
Monday, October 29, 2012
Tuesday, October 23, 2012
Pumpkin Mac & Cheese
Wow it has been awhile since I last posted. Completely unintentional, I promise. It would seem life has other plans for me that didn't involve my lovely little blog.
In any case, here I am and I come to bring you pumpkin recipes!
It is (long since) officially fall which brings with it cooler air, sweaters and pretty leaves. This is very much my favorite season. If it could be fall all year I'd be a very happy me. It is during these cooler months we give ourselves permission to enjoy heartier meals. Meals with substance, if you will. Its time for hearty soups, stews and casseroles. No one really wants a beefy stew in the middle of July, but on a cool October evening, it sounds just perfect.
This time of year also brings with it pumpkins. Pumpkins for decorating and pumpkins for eating. One of my most favorite things is pumpkin pie, and no one does it quite like my momma.
For this little post I bring to you Pumpkin Mac & Cheese. Not for the faint of heart, or the lactose intolerant. Read on.....if you dare.......
The Needs:
1lb dry pasta
1 quart whole milk (I used 1%)
1 stick butter, divided
1/2c flour
1 15oz can pumpkin (make sure it is pure pumpkin puree and not pumpkin pie filling - they're two very different things!)
8oz grated gruyere cheese
8oz grated cheddar
4oz cumbled gorgonzola
1/2c romano cheese
1tsp mustard powder
1/2tsp nutmeg
1/2tsp ground pepper
1tbl spoon salt
1 1/2c panko break crumbs
The How:
Cook pasta to al dente
Preheat oven to 350F
Heat milk in saucepan. Be sure the milk doesn't boil, but is heated through.
Melt 6 tablespoons of butter in large pot over medium heat. Once melted add flour and whisk constantly until combined and turns a light brown color.
Slowly add the milk, whisking until smooth and thick.
Remove from heat, stir in gruyere, cheddar and gorgonzola, pumpkin, salt, pepper, nutmeg and mustard powder.
Stir until combined
Add pasta, stir until covered
Pour into lightly greased baking dish
Melt remaining butter, mix with panko crumbs and romano cheese and spread over top of pasta.
Bake 30-40mins

Sunday, September 9, 2012
I'm back....
...and I've got a tomato sauce recipe for y'all!
Sorry I've been MIA. This summer was met with two weddings, both of which I was in, and a busy work schedule, which left not much time for anything else.
The fall is my favorite time of year. While fall isn't officially upon us the weather has shifted just enough that I can start thinking about stews and casseroles and all those yummy things that are too heavy for the hot summer months.
Today I whipped up a batch of tomato sauce. I was given a bunch of tomatoes and fresh basil that just begged to be made into a delicious sauce. And since they asked so nicely I happily obliged!
The Needs:
at least 8 large, fleshy tomatoes
3-4 cloves garlic
olive oil
1 medium onion, diced
1 sweet pepper, chopped
3 tbl spoons red wine vinegar, or actual red wine
2 tbl spoons white sugar
1 tbl spoon balsamic vinegar
generous bunch of basil
1-2 parmesan rinds
Oregano to taste
S & P to taste
Now, if you're like I was an are intimidate by using fresh tomatoes instead of canned I am here to tell you it is easy peasy!
The Hows:
To prepare the tomatoes simply slice off the stem end and dig out the core.
Place the tomatoes a few at a time in a pot of boiling water for about 30secs. Remove them and immediately place in an ice bath to halt the cooking process. The skins should easily slip right off. At this point remove the seeds as well. Now your tomatoes are ready to roll.
In the bottom of a large pot heat a splash of olive oil over low heat.
Add the chopped onion. Stir to coat in the oil. Cook until translucent.
Add garlic. Stir to combine. Cook approximately 2mins.
Add the tomatoes. Allow to simmer over low.
*now, I can't tell you how long to let it simmer. Mine took quite awhile as it seems my 'maters had lots of water in them, so it took awhile for the extra liquid to evaporate.
**I also discovered as the tomatoes started to break down that I wasn't going to end up with much sauce, so I added a large can of stewed tomatoes to stretch it out further
Add in the handful of basil. I recommend not chopping it as you're going to fish it out at the end.
Add the chopped pepper
Allow to simmer 45mins-1hr.
Dig out the basil.
Add in the parmesan rind(s). Trust me on this one. If you don't have the rind, grate in some fresh parm.
Simmer an additonal 20mins
Add red wine vinegar and balsamic
Add sugar (this helps cut the acidity of the canned tomatoes)
Before adding the rest of the spices give the mixture a taste test then season accordingly.
This sauce breaks down nicely on its own, so you can leave it as it is if you prefer a slightly chunky sauce. Myself, I prefer a smoother texture so I lightly processed mine.
You can store this in the fridge in an air tight container for about 5 days. This also freezes well for use at a later time.
To me, this is a perfect sauce. This could be easily turned into a meat sauce by adding browned ground beef. Or add some dried chili flakes for a little extra kick. Either way, tasty on its own or a great starting point for creating a sauce that is all your own! Use it on pasta, in lasagna, or perhaps for chicken parm...either way, I'm sure you'll love this as much as I do!
Monday, July 23, 2012
Simple, tasty steak marinade
I just have to say I love BBQ season. Sure you can grill all year round, but there is just something about grilling in the sunshine that makes it so much better. I'm happy its here. I don't recall the last time I cooked something on the stove or in the oven.
I snagged a couple of steaks over the weekend. Now, I knew I wanted to grill them but I also wanted them to be more than just a couple of steaks on the grill. The solution: marinade them. I whipped together a bowl of awesome delicousness:
(no exact measurements here, folks)
olive oil
balsamic vinegar
1-2 garlic cloves, minced
quirt of prepared mustard
fresh cracked pepper
worscestershire sauce
soy sauce
Toss your steaks into a zip lock baggie and pour this liquid delicious on top. Let sit in freeze for a few hours (overnight would be even better). Remove from fridge about an hour before grilling to allow them to come to room temperature (just throwing them straight on to the grill will make 'em tough: cold steak + hot grill = boot leather).
And once again I'm slacking in the photo department. Sorry gang. I'll try to remember for next time.
Tuesday, July 17, 2012
Coke Float Cupcakes
You guys, these are like chocolate cupcakes on crack.
No joke.
The cake is light, fluffy and moist. It is pretty close to cupcake perfection.
This recipe could easily be adapted to use root beer, or another cola of your choice. Simply swap out the Coke for your fizzy beverage of choice.
And here come the details:
The Cupcake-
1c Coke
1/2c butter
1/2c veg oil
1/4c cocoa, sifted
22 marshmallows (yup, 22. precisely)
2c flour
up to 2c sugar (though I used 1c sugar, 1/4 granulated sweetener)
1tsp baking soda
1tsp vanilla
1c buttermilk
2 eggs, beaten
Preheat oven to 325
In pot over med-low heat mix cola, butter, veg oil and cocoa. Bring to a boil. Remove from heat. Add the marshmallows, cover pot to allow marshmallows to melt. Stir occasionally.
In mixer, mix flower, sugar and baking soda.
Add buttermilk, eggs and vanilla. Mix well.
Combine the melty marshamllow goop with the flour. Mix until just combined. It may look like the batter is rather runny. Don't worry. It is supposed to look that way.
Line cupcake tin, or spray with nonstick spray, fill to 2/3.
Bake 20mins.
Allow to cool completely before frosting.
I was going to make a fancy schamncy Coke infused boiled icing to go with these. But then I realized it was almost 10pm and I just wanted to be done and get to bed. So I went with my standard buttercream, threw in a splash of Coke and some cocoa and we were off to the races.
The Frosting-
1c softened, unsalted butter
3-4c icing sugar (if you wish to make chocolate buttercream add 1/4c cocoa in place of some of the icing sugar)
1/4tsp salt
1tblsp vanilla
up to 4 tblspns milk (or in this case Coke)
Beat butter
Add 3c icing sugar (plus the cocoa if using); mix on low speed
Increase speed to medium; add vanilla and milk (or Coke)
Add more icing sugar as needed to reach desired consistency
This frosting works well if you want to pipe it, it works just as well if want to just slather it on willy-nilly. It also works well for eating directly out of the bowl. No cupcake needed. Jus'sayin.
These little babies were made for a bake sale. Because I was tired and wanted to tap out and go to bed I totally forgot to snap a picture. So you're just going to have to trust me when I say not only are they delicious they're also pretty darn cute!
Tuesday, June 26, 2012
Nacho Casserole
Ok ladies and gents, this is a fly by the seat of my pants creation. So if you're expecting an exact recipe this is not the post for you. But, if you are expecting a description of how I created tonight's yummolicious dinner then this post is exactly for you!
The decision of what to make for dinner tonight was more of a challenge than it should have been. I spent the day at work and just wanted something easy when I came home. Unfortunately for me I am running low in the grocery department. Random bits and pieces I have, but actual things to make a cohesive meal? Not so much.
I opened my cupboard and spied a bag of nacho chips, a jar of tomato sauce and a can of corn. I also knew I had a small package of ground beef in the freezer. I was pretty certain I could create something out of these things, so off I went.
Preheat oven to 325F
1) Brown ground beef in pan.
2) Drain off fat.
3) Add can of corn and a can of mushrooms
4) In separate bowl mix together a few spoon fulls of mayo (the tangy Miracle Whip stuff, not the legit mayo), a healthy pour of tomato sauce (see, told you this wouldn't be exact), a sprinkle of paprika, cayenne and chilli powder.
5) Pour mayo mixture over ground beef, stir.
6) In bottom of baking dish crumble nacho chips - just sort of break up the chips so they lay flatter in the dish, but don't mulch them up too much
7) Pour the beef-mayo mixture over the nachos
8) Bake at 325 for 15-20mins
9) Remove from oven, top with grated cheese of your choice (I used white cheddar)
10) Return to oven for another 5mins to melt cheese
 11) Place heaping piles of this delightfulness into bowls
12) Enjoy!
The decision of what to make for dinner tonight was more of a challenge than it should have been. I spent the day at work and just wanted something easy when I came home. Unfortunately for me I am running low in the grocery department. Random bits and pieces I have, but actual things to make a cohesive meal? Not so much.
I opened my cupboard and spied a bag of nacho chips, a jar of tomato sauce and a can of corn. I also knew I had a small package of ground beef in the freezer. I was pretty certain I could create something out of these things, so off I went.
Preheat oven to 325F
1) Brown ground beef in pan.
2) Drain off fat.
3) Add can of corn and a can of mushrooms
4) In separate bowl mix together a few spoon fulls of mayo (the tangy Miracle Whip stuff, not the legit mayo), a healthy pour of tomato sauce (see, told you this wouldn't be exact), a sprinkle of paprika, cayenne and chilli powder.
5) Pour mayo mixture over ground beef, stir.
6) In bottom of baking dish crumble nacho chips - just sort of break up the chips so they lay flatter in the dish, but don't mulch them up too much
7) Pour the beef-mayo mixture over the nachos
8) Bake at 325 for 15-20mins
9) Remove from oven, top with grated cheese of your choice (I used white cheddar)
10) Return to oven for another 5mins to melt cheese

12) Enjoy!
Sunday, June 17, 2012
Stuffed Mushroom Caps with Roasted Veggies
I again was in the mood to cook today. I always enjoy cooking but there are some days when I just *want* too cook. And today was definitely one of those days.
I made a trip to the Farmer's Market yesterday and came home with carrots, beets, milk, cheese and a bottle of wine. A well rounded trip if I do say so myself!
I knew I wanted to roast the beets and carrots and wanted something to go with them. I made a trip to the grocery store to see what grabbed my attention. And then there they were, portobello mushroom caps. And there, my friends, was the inspiration for dinner this evening.
 The Mushrooms
6-8 mushroom caps
5-6 garlic cloves, minced
half a large onion, minced
1 carrot, grated
8-10 asparagus spears, chopped into half inch size pieces
1-1.5 cups broccoli florets cut up into small pieces
1 package ground sausage meat (I used mild)
olive oil
cheese
Preheat oven to 425
-Prepare mushroom caps. Scoop out the ribs and remove the stem. Place in baking dish, stem side up.
-Brown sausage meat in pan over medium heat
-Throw all the veggies and garlic in a separate pan with a splash of olive oil and cook until onions are soft and broccoli is cooked through
-Combine the sausage with the veggies
-Scoop mixture into the mushroom caps
-Bake in oven 12-15minutes
-Top with grated cheese, place back in oven until cheese melts
The Veggies
1 small bag of baby potatoes
1-2 onions, quartered
12 carrots (the bunches you can buy with the tops still on); or as many as required to feed your party
12 beets
-Remove tops from beets. Place in a foil pouch with olive oil and salt and pepper. Bake at 425 for 40mins.
-Prepare veggies, place in baking dish with olive oil, salt and pepper. Bake at 425 25mins.
-Remove beets from oven, allow to cool enough to handle to remove the skins. Place beets in same dish as rest of veggies. Return to oven, bake an additional 15mins.
I made a trip to the Farmer's Market yesterday and came home with carrots, beets, milk, cheese and a bottle of wine. A well rounded trip if I do say so myself!
I knew I wanted to roast the beets and carrots and wanted something to go with them. I made a trip to the grocery store to see what grabbed my attention. And then there they were, portobello mushroom caps. And there, my friends, was the inspiration for dinner this evening.

6-8 mushroom caps
5-6 garlic cloves, minced
half a large onion, minced
1 carrot, grated
8-10 asparagus spears, chopped into half inch size pieces
1-1.5 cups broccoli florets cut up into small pieces
1 package ground sausage meat (I used mild)
olive oil
cheese
Preheat oven to 425
-Prepare mushroom caps. Scoop out the ribs and remove the stem. Place in baking dish, stem side up.
-Brown sausage meat in pan over medium heat
-Throw all the veggies and garlic in a separate pan with a splash of olive oil and cook until onions are soft and broccoli is cooked through
-Combine the sausage with the veggies
-Scoop mixture into the mushroom caps
-Bake in oven 12-15minutes
-Top with grated cheese, place back in oven until cheese melts
The Veggies
1 small bag of baby potatoes
1-2 onions, quartered
12 carrots (the bunches you can buy with the tops still on); or as many as required to feed your party
12 beets
-Remove tops from beets. Place in a foil pouch with olive oil and salt and pepper. Bake at 425 for 40mins.
-Prepare veggies, place in baking dish with olive oil, salt and pepper. Bake at 425 25mins.
-Remove beets from oven, allow to cool enough to handle to remove the skins. Place beets in same dish as rest of veggies. Return to oven, bake an additional 15mins.
Wednesday, June 13, 2012
Garlic Chicken with Zucchini "chips" and Asparagus
It's dinner time!
Admittedly my eating habits have been kinda, well, not good. I've been a smidge on the busy side so unfortunately many of my meals of come via a window and wrapped in wax paper. Hey, its better than not eating, right? Or is it? Ok ok, don't judge me.
As I was leaving work I realized I was craving real food. Food that once grew in the ground and meat that was recognizable. After a quick stop at the grocery store (why is it you can never walk in there and make it out without buying a dozen other things that weren't on your list?) I was home to make some din-din.
 The menu this evening: Garlic Brown Sugar Chicken with Oven-Fried Zucchini "chips" and Cheesy Asparagus.
Oh, I know.
It was every bit as delish as it sounds!
The zucchini had a lightly crisp outside with a tender, almost creamy inside.
The asparagus was just delightful. I like mine still with a bit of bite left, and these were perfect.
The chicken was flavorful, tender and moist.
A pretty yummy supper if I do say so myself!
The Chicken:
4 Boneless skinless chicken breasts
4 cloves of garlic, minced
4 tbl spoons brown sugar
3 teaspoons olive oil
Preheat oven to 500F
-In a small saute pan, saute garlic with oil until tender
-Remove from heat
-Stir in brown sugar
-Place chicken breasts in baking dish that has been lightly sprayed with nonstick cooking spray
-Cover chicken with brown sugar mixture
-Bake 20-30mins, or until done
The Zucchini:
(I winged this recipe so I don't have exact measurements for what I used)
Flavored breadcrumbs (I used italian)
Parmesan cheese
Zucchini
Salt & Pepper
-slice zucchini into rounds
-mix bread crumbs, parmesan, salt and pepper together
-coat rounds in crumb mixture
-place on baking sheet
I threw these in the oven at the same time as the chicken, and they were done at pretty well the same time
The Asaparagus:
Asparagus
Cheese of your choosing
Salt and Pepper
-place asparagus in grill pan (fry pan will work too) with a splash of olive oil
-cook over medium until done
-sprinkle with finely grated cheese (I used Old White Cheddar)
And voila! Dinner!
Now, if you're not a fan of sweet I would suggest going with half the amount of brown sugar on the chicken and adding a splash of soy sauce to balance out the sweet.
Or add a bit of chili sauce to give it a punch of heat!
Or leave it as is, because really it is kinda fabulous on its own.
Jus'sayin.
Admittedly my eating habits have been kinda, well, not good. I've been a smidge on the busy side so unfortunately many of my meals of come via a window and wrapped in wax paper. Hey, its better than not eating, right? Or is it? Ok ok, don't judge me.
As I was leaving work I realized I was craving real food. Food that once grew in the ground and meat that was recognizable. After a quick stop at the grocery store (why is it you can never walk in there and make it out without buying a dozen other things that weren't on your list?) I was home to make some din-din.

Oh, I know.
It was every bit as delish as it sounds!
The zucchini had a lightly crisp outside with a tender, almost creamy inside.
The asparagus was just delightful. I like mine still with a bit of bite left, and these were perfect.
The chicken was flavorful, tender and moist.
A pretty yummy supper if I do say so myself!
The Chicken:
4 Boneless skinless chicken breasts
4 cloves of garlic, minced
4 tbl spoons brown sugar
3 teaspoons olive oil
Preheat oven to 500F
-In a small saute pan, saute garlic with oil until tender
-Remove from heat
-Stir in brown sugar
-Place chicken breasts in baking dish that has been lightly sprayed with nonstick cooking spray
-Cover chicken with brown sugar mixture
-Bake 20-30mins, or until done
The Zucchini:
(I winged this recipe so I don't have exact measurements for what I used)
Flavored breadcrumbs (I used italian)
Parmesan cheese
Zucchini
Salt & Pepper
-slice zucchini into rounds
-mix bread crumbs, parmesan, salt and pepper together
-coat rounds in crumb mixture
-place on baking sheet
I threw these in the oven at the same time as the chicken, and they were done at pretty well the same time
The Asaparagus:
Asparagus
Cheese of your choosing
Salt and Pepper
-place asparagus in grill pan (fry pan will work too) with a splash of olive oil
-cook over medium until done
-sprinkle with finely grated cheese (I used Old White Cheddar)
And voila! Dinner!
Now, if you're not a fan of sweet I would suggest going with half the amount of brown sugar on the chicken and adding a splash of soy sauce to balance out the sweet.
Or add a bit of chili sauce to give it a punch of heat!
Or leave it as is, because really it is kinda fabulous on its own.
Jus'sayin.
Saturday, June 9, 2012
A stroll through Nova Scotia wine country
Yes, for those who aren't aware Nova Scotia does in fact have a thriving wine industry. No, we're not quite up to Napa Valley standards, but we're holding our own and have produced some lovely, award winning wines.
Up until just a few years ago I was not a wine lover. I wasn't even a liker. Wine seemed snooty to me. But oh how wrong I was. And then I discovered Nova Scotia was producing wine. I fully admit my first thought was "oh, this stuff can't be that good". Again, I stand corrected.
I had only tried 3 Nova Scotia wines: 2 from Grand Pre (Muscat & Reserve L'Acadie) and one from Jost (Eagle Tree Muscat). The Muscat from Grand Pre is, thus far, my favorite wine. I was not at all a fan of their l'Acadie. And the Eagle Tree was purchased on a whim when my local NSLC didn't carry my beloved Muscat. Turns out it wasn't a bad purchase!
A wine tour was arranged with some folks from work. We all piled into a shuttle bus and off we went. I was sad to learn Grand Pre wasn't on our list of wineries to visit. On our list was L'Acadie Vineyard,
Luckett Vineyards and Blomidon Estate Winery.
 First stop: L'Acadie Vineyard. These folks are award winning producers of sparkling wines. They are also the only vineyard in Nova Scotia to be certified organic. For anyone who follows/knows about sparkling wine making they make their wines following traditional methods: the fermentation takes place in the same bottle the wine is sold in.
L'Acadie Vineyard's 2007 Prestige Brut was a silver medal winner at Effervescents du Monde, Best Sparkling Wines in the world in Dijon, France. For a small Nova Scotian vineyard this is quite an accomplishment. And let me tell you for someone who is not a sparkling wine fan this was delicious! Light, fine bubbles, not overly sweet but just sweet enough. While I did not buy a bottle I will stop in on my next visit to the valley to pick one up.
 Next stop: Luckett Vineyard. These guys are the new kid in town. They were only established in 2010. One thing is certain: their grapes have a fantastic view.
Now, anyone who knows Pete Luckett (of Pete's Frootique) knows he tends to do things well and with a touch of quirkiness thrown in for good, fun, measure. And the same holds true for his vineyard: how many vineyards have you seen with a bright red phone booth planted in the middle?
We were able to sample several of their wines: whites- Tidal Bay and Ortega to name a few; reds-I'm not a red fan so I skipped out on these ones; dessert- Juliet cherry, Vidal icewine, sparkling apple and blackcurrant among others.
As soon as I heard they had a cherry wine I HAD to try it. I love cherries. LOVE. I am always disappointed when something is said to taste like cherry (or strawberry or whatever) but doesn't. But this? This tasted like cherries. It is pretty sweet, but it is a dessert wine after all. After one sip I knew I was not going to walk out of there without bringing a bottle home with me. It was worth the $25 for the bottle.
 We all hopped back on the bus headed for our next, and final stop. Then I heard a rumor. Is it true? Are we really making a quick stop at Grand Pre?
We are!
Oh how happy this makes my heart.
We unloaded and all 14 of us descended upon the wine shop. I'm pretty sure the staff didn't know what hit them. But we all started buying stuff. I, of course, a bottle of their Muscat. I was happy to see I could buy it for $5 less than i usually get it in store. Happy times!
While this wasn't on our wine tour itinerary the lovely folks at Grand Pre were nice enough to supply us with some samples anyway.
 Our final stop was at Blomidon Estate Winery. These folks also have a great view over the Minas Basin. Their grapes are lucky grapes.
Again we got a variety of samples. I also skipped out on the reds, not being a big fan myself. I did try their Tidal Bay white and a rose. Their Tidal Bay is delightful and of the ones we tried throughout the day this was my favorite. While I did not buy a bottle I certainly will.
There you have it, ladies and gents. While there is more to Nova Scotia wine country than what I have noted here this gives you a quick snapshot of what our lovely province has to offer. So, the next time someone mentions a Nova Scotia wine, give it a try. I guarantee you'll find something out there you'll fall in love with. Like Grand Pre's Muscat. Jus'sayin.
Up until just a few years ago I was not a wine lover. I wasn't even a liker. Wine seemed snooty to me. But oh how wrong I was. And then I discovered Nova Scotia was producing wine. I fully admit my first thought was "oh, this stuff can't be that good". Again, I stand corrected.
I had only tried 3 Nova Scotia wines: 2 from Grand Pre (Muscat & Reserve L'Acadie) and one from Jost (Eagle Tree Muscat). The Muscat from Grand Pre is, thus far, my favorite wine. I was not at all a fan of their l'Acadie. And the Eagle Tree was purchased on a whim when my local NSLC didn't carry my beloved Muscat. Turns out it wasn't a bad purchase!
A wine tour was arranged with some folks from work. We all piled into a shuttle bus and off we went. I was sad to learn Grand Pre wasn't on our list of wineries to visit. On our list was L'Acadie Vineyard,
Luckett Vineyards and Blomidon Estate Winery.

L'Acadie Vineyard's 2007 Prestige Brut was a silver medal winner at Effervescents du Monde, Best Sparkling Wines in the world in Dijon, France. For a small Nova Scotian vineyard this is quite an accomplishment. And let me tell you for someone who is not a sparkling wine fan this was delicious! Light, fine bubbles, not overly sweet but just sweet enough. While I did not buy a bottle I will stop in on my next visit to the valley to pick one up.

Now, anyone who knows Pete Luckett (of Pete's Frootique) knows he tends to do things well and with a touch of quirkiness thrown in for good, fun, measure. And the same holds true for his vineyard: how many vineyards have you seen with a bright red phone booth planted in the middle?
We were able to sample several of their wines: whites- Tidal Bay and Ortega to name a few; reds-I'm not a red fan so I skipped out on these ones; dessert- Juliet cherry, Vidal icewine, sparkling apple and blackcurrant among others.
As soon as I heard they had a cherry wine I HAD to try it. I love cherries. LOVE. I am always disappointed when something is said to taste like cherry (or strawberry or whatever) but doesn't. But this? This tasted like cherries. It is pretty sweet, but it is a dessert wine after all. After one sip I knew I was not going to walk out of there without bringing a bottle home with me. It was worth the $25 for the bottle.

We are!
Oh how happy this makes my heart.
We unloaded and all 14 of us descended upon the wine shop. I'm pretty sure the staff didn't know what hit them. But we all started buying stuff. I, of course, a bottle of their Muscat. I was happy to see I could buy it for $5 less than i usually get it in store. Happy times!
While this wasn't on our wine tour itinerary the lovely folks at Grand Pre were nice enough to supply us with some samples anyway.

Again we got a variety of samples. I also skipped out on the reds, not being a big fan myself. I did try their Tidal Bay white and a rose. Their Tidal Bay is delightful and of the ones we tried throughout the day this was my favorite. While I did not buy a bottle I certainly will.
There you have it, ladies and gents. While there is more to Nova Scotia wine country than what I have noted here this gives you a quick snapshot of what our lovely province has to offer. So, the next time someone mentions a Nova Scotia wine, give it a try. I guarantee you'll find something out there you'll fall in love with. Like Grand Pre's Muscat. Jus'sayin.
Sunday, June 3, 2012
Salmon & Avocado Burger
Happy Weekend, all!
Yes, I realize it is Sunday and the weekend is pretty well over. Nonetheless, I do hope you enjoyed it and the weather treated you all well, where ever you were.
I realized today that I have been eating far too much pasta lately. Don't get me wrong I love me some pasta. LOVE. But when you realize you've been eating pasta more nights than not it is time to shake things up a bit.
I came across some recipes lately for salmon burgers. Interesting. But I couldn't quite find one that I liked. I found I was liking bits and pieces from each recipe but didn't find one, as a whole, that I liked. So, I picked a bit from here and a bit from there and this is what I ended up with:

The Burger:
Salmon Filets
1 egg beaten
1 green onion, finely chopped
3 tbsp flax meal
2 tbsp finely chopped dill
1 tbsp lemon juice
1/2 tsp salt
1/2 avocado, diced
Dash of your favorite chili sauce
Remove and discard skin from salmon. Chop into 1/2-in pieces, transfer to large bowl. Stir in egg, onion, flax, dill, lemon juice and salt. Gently stir in avocado.
Heat large nonstick frying pan over medium. Give the pan a quick spritz with cooking spray. Pile in a heaping 1/2c measure of the mixture into the pan. Form and press into 1-in thick patty. Repeat process. Do not over crowd the pan.
Cook until the bottoms are golden brown and crispy, 3-4mins. Flip and continue cooking until cooked through, approx 3mins longer.
Top with peach salsa. Serve on traditional burger bun, or on grainy bread.
Tips: the next time I make this I'll skip the chopping of the salmon. The piles just didn't stay formed as patties. They all sort of just came apart. Next time, I'll just cut my salmon filets into individual portions and cook that way. I'll also go a little heavier on the chili sauce.
The Wing Man....
Roasted Potato and Vegetable Salad
2-3 lbs potatoes cut into chunks
1 med onion, chopped
1 red pepper cut into strips
1 can corn
3 tbsp canola or vegetable oil
salt and pepper
The dressing:
2tbsp Apple Cider vinegar
2tbsp canola oil
2tsp dijon mustard
Combine first 5 ingredients, leaving out the corn for now
Bake at 400 for 25mins until edges start to turn brown
Remove from oven, add can of drained corn
Cook an additional 15mins
Toss with dressing. Serve.
Sunday, May 27, 2012
Just Poachie
Poached eggs. We have a love hate relationship. I love them, but I've never been able to successfully prepare them.
Until this morning.
It seems it is all about the temperature of the water. You want it super hot, but not boiling or simmering. You want it to the point just before it simmers. And there, my friends, was where I was making my mistakes. I had it in my head the water needed to be boiling. Not so.
So, fill a pot with a few inches of water. Bring it to the point just before it simmers. You'll see lots of tiny bubbles on the bottom of your pot. Add a small splash of vinegar. There is some debate out there as to whether or not the vinegar actually does anything. I used it and ended up with pretty good poached eggs. Ultimately, do what works for you. Apparently the vinegar helps tighten up the egg so it doesn't end up all spread out around the pot. Seemed to work for me.
 Break an egg into a small bowl. When your water is ready gently slide the egg into the water. This is much easier than trying to break the egg straight in to the water.
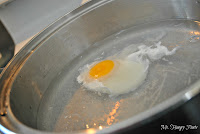
And now you wait. But don't wander too far. You've still got to monitor the water temperature to make sure it doesn't start to boil on you. If it starts to get too hot turn back the temp a bit.
 Leave the little devils in the water until they're done to your liking. When done plop them on top of toast or something else of your choosing. A sprinkle of salt and fresh cracked pepper and you've got yourself lovely poached eggs!
Until this morning.
It seems it is all about the temperature of the water. You want it super hot, but not boiling or simmering. You want it to the point just before it simmers. And there, my friends, was where I was making my mistakes. I had it in my head the water needed to be boiling. Not so.
So, fill a pot with a few inches of water. Bring it to the point just before it simmers. You'll see lots of tiny bubbles on the bottom of your pot. Add a small splash of vinegar. There is some debate out there as to whether or not the vinegar actually does anything. I used it and ended up with pretty good poached eggs. Ultimately, do what works for you. Apparently the vinegar helps tighten up the egg so it doesn't end up all spread out around the pot. Seemed to work for me.

And now you wait. But don't wander too far. You've still got to monitor the water temperature to make sure it doesn't start to boil on you. If it starts to get too hot turn back the temp a bit.
 Leave the little devils in the water until they're done to your liking. When done plop them on top of toast or something else of your choosing. A sprinkle of salt and fresh cracked pepper and you've got yourself lovely poached eggs!
Saturday, May 26, 2012
Chocolate Nutella Cupcakes with Vanilla Cream Cheese Frosting
Yes, you read that correctly: Chocolate Nutella Cupcakes with Vanilla Cream Cheese Frosting.
I. KNOW.
And yes they are diet friendly.
I wanted to make a batch of cupcakes to take to my cousin who just turned 10 a few days ago (yup, a bit late on that one...better late than never though, right?). I wanted something more than my standard chocolate cup cake, but wanted familiar flavors for her 10 year old taste buds. I'm not so sure she would have appreciated the chocolate Irish cream with caramel butter cream I've made.
I also wanted to make them look fun and pretty for her. Any excuse for a trip to Michaels!
I came home and whipped up a bunch of these little babies.
The cupcake:
2/3c Nutella
1c regular flour
1 1/2c cake flour
1 1/2c cocoa
2tsp baking soda
1tsp baking powder
3/4tsp salt
3 eggs
1 1/2c sugar
3/4c softened butter
2 1/2c butter milk*
Preheat oven to 350F.
Sift flour, cocoa, baking soda, baking powder and salt. Set aside.
In large bowl beat eggs and sugar for 5mins. Then add in butter. Mix until combined. Add Nutella. Mix. Add buttermilk and mix until well incorporated.
Add flour mixture in 3 increments and beat until smooth.
Line cupcake tin with liners of your choice, though this recipe totally warrants using fun ones! Fill cupcake tine and bake 20-25mins, until toothpick comes out clean.
I found in my oven they were perfectly done at 25mins. Cooking times may vary depending on the oven. I find my oven runs a bit cooler than others I've cooked in, so bear that in mind.
The Frosting:
8 ounces cream cheese. I used the Light variety. Told you they were diet friendly.
5 tablespoons room temperature butter
3 3/4c icing sugar
2 tsp clear vanilla extract **
Cream butter and cream cheese in large mixing bowl.
Add vanilla.
Slowly add the icing sugar, scraping the sides of the bowl as you go.
Beat on high until smooth and fluffy.
Add a bit of milk or more sugar if needed to reach desired consistency.
*don't have buttermilk? Add 1 tablespoon of lemon juice or vinegar per 1c of regular milk. Let it sit until it curdles, about 10mins.
**clear vanilla extract helps maintain a pure white color of the frosting. But if this isn't important to you, then go ahead and use the regular stuff, which is what I did.
Oh, I should perhaps warn you this recipe will yield a bazillion regular sized cupcakes. If you prefer the minis you'll be baking cup cakes for days. I actually just did a head count: 2.5 dozen plus 1. The frosting recipe will yield enough to frost the whole batch.
Another warning: if you are not a big chocolate fan these are probably not for you.
The cake is super chocolatey while being light, fluffy and moist. Everything you want a perfect little cup cake to be!
Tip: if you intend to pipe your frosting you may want to chill it for a few minutes first. I found once the heat from my hands hit the piping bag it went soft pretty quickly.
I think these will be my new go-to chocolate cupcakes! They're so beyond delicious! And because the recipe makes so many you've got plenty to share! Or not. Either way, they're yummy and worth every bite!

I. KNOW.
And yes they are diet friendly.
I wanted to make a batch of cupcakes to take to my cousin who just turned 10 a few days ago (yup, a bit late on that one...better late than never though, right?). I wanted something more than my standard chocolate cup cake, but wanted familiar flavors for her 10 year old taste buds. I'm not so sure she would have appreciated the chocolate Irish cream with caramel butter cream I've made.
I also wanted to make them look fun and pretty for her. Any excuse for a trip to Michaels!
I came home and whipped up a bunch of these little babies.
The cupcake:
2/3c Nutella
1c regular flour
1 1/2c cake flour
1 1/2c cocoa
2tsp baking soda
1tsp baking powder
3/4tsp salt
3 eggs
1 1/2c sugar
3/4c softened butter
2 1/2c butter milk*
Preheat oven to 350F.
Sift flour, cocoa, baking soda, baking powder and salt. Set aside.
In large bowl beat eggs and sugar for 5mins. Then add in butter. Mix until combined. Add Nutella. Mix. Add buttermilk and mix until well incorporated.
 |
| So good you'll want to just eat it straight from the bowl |
Line cupcake tin with liners of your choice, though this recipe totally warrants using fun ones! Fill cupcake tine and bake 20-25mins, until toothpick comes out clean.
 | |
| Happy naked little cupcakies |
The Frosting:
8 ounces cream cheese. I used the Light variety. Told you they were diet friendly.
5 tablespoons room temperature butter
3 3/4c icing sugar
2 tsp clear vanilla extract **
Cream butter and cream cheese in large mixing bowl.
Add vanilla.
Slowly add the icing sugar, scraping the sides of the bowl as you go.
Beat on high until smooth and fluffy.
Add a bit of milk or more sugar if needed to reach desired consistency.
*don't have buttermilk? Add 1 tablespoon of lemon juice or vinegar per 1c of regular milk. Let it sit until it curdles, about 10mins.
**clear vanilla extract helps maintain a pure white color of the frosting. But if this isn't important to you, then go ahead and use the regular stuff, which is what I did.
Oh, I should perhaps warn you this recipe will yield a bazillion regular sized cupcakes. If you prefer the minis you'll be baking cup cakes for days. I actually just did a head count: 2.5 dozen plus 1. The frosting recipe will yield enough to frost the whole batch.
Another warning: if you are not a big chocolate fan these are probably not for you.
The cake is super chocolatey while being light, fluffy and moist. Everything you want a perfect little cup cake to be!
Tip: if you intend to pipe your frosting you may want to chill it for a few minutes first. I found once the heat from my hands hit the piping bag it went soft pretty quickly.
I think these will be my new go-to chocolate cupcakes! They're so beyond delicious! And because the recipe makes so many you've got plenty to share! Or not. Either way, they're yummy and worth every bite!

Welcome! Bienvenue!
I have been toying with the idea lately of creating a blog for and about food. After much thought "Ms. Hungry Pants" was born!
I come from a family of fabulous cooks and bakers. So I was fortunate enough to learn a few tricks over my years. After many years of licking out bowls I finally jumped in and started baking and cooking for myself. As it would turn out I LOVE to cook. I freely admit that while I like to bake it isn't one of my most favorite things. I think that has something to do with the rigidity of the recipes. While there is some room to play with them I much prefer the throw-it-all-in-a-pot-and-see-what-happens approach to cooking. Sometimes I get a win, sometimes I get a fail, but its all part of the fun.
My hope for this blog is to share my food experiences with everyone out there in Blogville. I will share recipes and restaurant experiences, both the good and the not so good - and some photographic evidence of such!
So, without further ado, ladies and gents I give you Ms. Hungry Pants!
Subscribe to:
Posts (Atom)